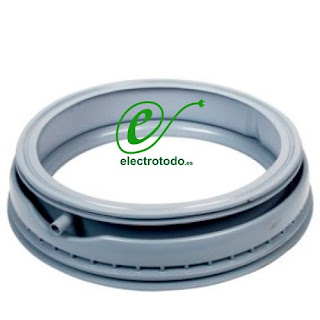
Change your washing machine door rubber yourself. repair tips
When the washing machine loses water from the front may be due to the fact that the door seal is punctured, bitten or cracked. A small damage can cause the joint that makes the door glass with the hatch rubber not working correctly.
Why do washing machine rubbers break?
Sometimes pieces of clothing such as zippers, hooks or shoelaces can cause breakage and breakdowns on the door seal. It is advisable to turn denim garments over or put garments with buckles in the bottom of the drum. Also be careful with the slippers! The piece may also suffer wear due to the continued use of the appliance: water and detergents cause the rubber to suffer damage over time.
Check the condition of the rubber carefully before carrying out the repair: water leaks usually occur when the tear is in the lower part of the rubber.
Changing the rubber step by step:
* Before starting the repair, examine the position of the damaged washer rubber carefully: it probably has some holes in the lower part, or some other way to identify the correct position of the part. It is even recommended that you take photographs to serve as a guide later.
1.- Set aside the tongue that fits into the outer sheet of the washing machine. You can use a flat screwdriver (large) or a spatula (plastic so as not to mark the paint on the appliance).
2.- Almost all washing machine door rubbers have a flange clamping metal (with a spring or an adjustment screw for fixing). Remove this flange.
3.-Now that the outer part of the rubber is free, push it to the bottom from the tank until you can see the inner flange, a metal fixing somewhat larger than the outer one and that holds the inner part of the rubber to the bass drum.
4.- Locate the fastening system of the inner flange: you will have to loosen a screw or pull a spring. When you remove this clamp, you can remove the rubber that caused the failure (and you have half the job done). There may be dirt in the places where the rubber was attached. It is recommended that it be clean so that the new hatch rubber is perfectly positioned so that there are no new leaks.
5.- Now we are going to carry out the steps in reverse: place the hatch rubber in the drum of the washing machine, remember to place the rubber in the same position as the previous one: they usually haveholesdrain at the bottom. When it is in place, turn it over as at the time of removal in order to gain access to the flange as easily as possible.
6.- Once placed in thetambor, you must fit the inner flange and make sure that the clamping screw is tight.
7.- Pull the rubber so that it is in its final shape and fit the replacement rubber into themetal door frame(almost done).
8.- Place the external flange between the rubber and the frame again, you can again use a screwdriver or a tool to pry.
If you have followed the steps correctly and everything has been well tightened, the fault will be solved and you will only have to put the castings that have accumulated in the last days.
** There are several different systems: some models of Fagor they have a tube at the top for water recirculation, in this case, you just have to disengage and fit the tube between steps 4 and 5. On some models of Bosch and house8 kilos, changing the rubber is VERY COMPLICATED and you have to remove a large part of the front, in other 7 kilo models, it is also necessary to remove it, but it is much easier.
Always remember to document with photographs and notes each step we are taking, in case at any time we feel lost, to be able to undo the path we have made.. Make sure you have all the necessary material throughout the repair before you start and, as always, we recommend that if you do not feel able to finish, it is better that you do not start with the repair, lest the attempt be expensive.


